595 Main Street, Suite 233, Laurel, Maryland, 20707
After Care Instructions
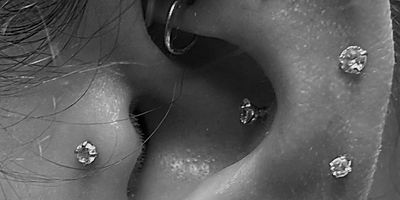
Piercings
The most common cause for a piercing to have issues with healing is direct contact with a dirty hand. Your hands must be washed prior to you cleaning and caring for your piercing. As there are many factors affecting the healing of your piercing, please see the following information on how to care for your piercing:
- Keep to a healthy lifestyle and take care of yourself! Drink plenty of water, get enough sleep, eat well, stay active, and avoid stress. Your body needs strength and rest to help you heal.
- Clean your piercing at least three times a day using our healing spray. NOTE: Oral piercings do not use healing spray if the piercing is inside of the mouth.
- Change your linens (bed sheets, pillowcases) every 3-4 days as they trap dead skin cells and can contribute to issues with your piercings.
- Avoid direct pressure on your piercing (tight clothing, pillows, helmets, phones, blowing your nose. When you are sleeping, do not sleep on the side where you received a piercing.
- Spray the healing spray to help loosen excess crust that typically forms around piercings.
- DO NOT rotate or change the jewelry until you are completely healed. Each time you rotate the jewelry, it causes the piercing to start the healing process over again.
HOW TO USE OUR HEALING SPRAY
If you received a bottle of our healing spray, below are instructions you should follow to achieve optimal healing.
- Before you begin, make sure you washing your hands before touching your piercing.
- For the first week, you will spray three times a day (morning, noon, and night) or when you are able to. For the second week, you will spray twice a day, and for the third week once a day.
- Spray the jewelry and let it air dry. Do not wipe, rotate or move the jewelry.
- If the jewelry develops the crustation around the piercing, you should spray to soften it and carefully remove it using sterile tweezers or the edge of a paper towel. Do not use q-tips or cotton.
- You should not attempt to change the jewelry, as this will start the healing process all over again.
ORAL PIERCINGS
- For oral piercings, be careful when brushing your teeth and flossing to not snag or irritate the piercing.
- Oral piercings should be cared for by using mouthwash after you eat. Rinse your oral piercing with warm salt water or an alcohol-free, antibacterial mouthwash after every meal or snack, and before you go to bed.
- Avoid contact with other people’s salvia.
- Eat healthy food, in small bites.
- Avoid eating spicy, salty, acidic, or hot temperature foods or beverages for the first two weeks (no specific foods need to be avoided)
- Cold foods and beverages can be soothing and help reduce swelling.
- FOR LABRET PIERCINGS: (cheek and lip) piercings be cautious about opening your mouth too wide as this can result in the jewelry catching on your teeth.
- DO NOT DRINK BEER for at least two weeks. Alcohol is fine; however, beer contains wheat which will result in the potential of getting an oral infection (thrush) which requires medication.
WHAT IS NORMAL?
- For the first three to five days, you may experience swelling, light bleeding, bruising, tenderness, and/or a whitish to yellow secretion that may form crust on the jewelry.
- After the first week, you may continue to experience some minor swelling and secretion.
- A piercing might seem healed before the healing process is complete. This is because piercings heal from the outside in. Although it feels fine, the tissue remains fragile on the inside. Be patient and keep clean throughout the entire healing period.
- For lip piercings, it is typical for the jewelry to “nest” slightly into the lip (on the inside) once it is healed.
- Even healed piercings that you have had for years can shrink or close within a few hours of the jewelry is removed. This varies from person to person; if you like your piercing, keep jewelry in! Do not leave the hole empty for an extended period.
TO MAINTAIN GOOD ORAL HYGIENE
- Use a new soft-bristled toothbrush and store it in a clean area from other toothbrushes.
- Brush your teeth and use your chosen rinse (saline or mouthwash) after every meal.
- During healing, floss daily, and gently brush your teeth, tongue, and jewelry. Once healed, brush the jewelry more thoroughly to avoid plaque buildup.
WHAT TO DO TO HELP REDUCE SWELLING
- Allow small pieces of ice to dissolve in the mouth.
- Take an over the counter, non-steroidal anti-inflammatory such as ibuprofen or naproxen sodium according to the package instructions.
- Do not speak or move your jewelry more than necessary.
- Sleep with your head elevated above your heart during the first few nights.
- Use a travel pillow and suspend your ear in the center opening while you sleep.
WHAT TO AVOID
- Do not play with your jewelry. Long term effects include permanent damage to teeth and gums.
- Avoid undue trauma; excessive talking or playing with jewelry can cause scar tissue, migration, and other complications.
- Avoid using mouthwash containing alcohol or peroxide. It can irritate the piercing and delay healing.
- Avoid oral sexual contact including wet kissing or oral sex during healing.
- Avoid chewing on tobacco, gum, fingernails, pencils, sunglasses, and other foreign objects that could harbor bacteria.
- Avoid sharing plates, cups, and eating utensils.
- Avoid using straws. Straw use can increase the risk of swelling and bleeding.
- Minimize the intake of smoking and vaping (tobacco or cannabis). It increases the risks and prolongs healing time.
- Avoid aspirin, alcohol, and copious amounts of caffeine if you are experiencing bleeding or swelling.
- Avoid submerging healing piercings in bodies of water such as lakes, pools, oceans, and even the bathtub.
- Refrain from putting body creams, makeup, moisturizers, and perfumes directly on the piercing.
- Do not turn or rotate your jewelry.
- In the shower, try to keep soaps or shampoos away from the area and rinse thoroughly after.
- Do not pull or pick the dried matter because it is attached to the healing tissue.
- Try to avoid sleeping on your piercing.
SIGNS OF PIERCING REJECTION
- Jewelry Displacement
- Jewelry that hangs or droops
- Complete jewelry dislodgement
- If you have had tummy surgery or major scar tissue, you run the risk of rejection
ESTIMATED HEALING TIMES
The stages of healing will vary for each person. Below are estimated healing times.
- Upper Lobe, Lower Lobes, Dermal Piercings and Transverse Lobe- 2-4 Months
- Tragus, Forward Helix, Helix, Rook, Anti-Helix/Snug, Conch- 6-12 Months
- Daith, Anti Tragus, Surface Tragus, Rook, Flat and Industrial- 9-12 Months
- Monroe, Medusa, Venom/Frog Eyes, Vertical/Midline (Traditional Tongue Piercing), Horizontal/Snake Eyes, Madonna, Double/Multiple and Tongue Web. 2-3 Months
- Smiley, Frowney, Vampire, Uvula- 1-2 Months
- Vertical "jestrum", Labret/Ashley, Labret, Vertical Labret, Angel Bites, , Cyber Bytes, Dolphin Bites, Dahlia Bites, Canine Bites, and Shark Bites- 2-3 Months.
WHEN IN DOUBT OR YOU HAVE ANY QUESTIONS DURING THE HEALING CALL OR TEXT US!
After Care Instructions for Tattoos
Tattoos
Properly taking care of a new tattoo is crucial to prevent scabbing, loss of color, detail, scarring, and most important getting an infection. When it comes to the process for healing a new tattoo, Bad Decisions Tattoos and Piercings has the best intentions for you during your visit. However, new tattoo care methods for optimal healing can vary drastically and have changed over the years. For this reason, we want to offer up our own tried-and-true guide to healing tattoos using the medical-grade dermal bandage Saniderm.
It is important you understand, that when you get a tattoo, the tattoo needle is puncturing the skin between 50 and 3,000 times per minute. The needle enters the outer layer of the skin (epidermis) and delivers the ink into the central layer of skin (dermis). It is important to understand this, because a tattoo, although it is beautiful, is now a beautiful open wound and must be treated as such. This means that it is critical to keep dirt, debris, and bacteria out.
The old traditional method used to heal our tattoos, was to cover the tattoo using household plastic wrap (Saran Wrap), and then removing the saran wrap after 2 to 24 hours later. We were then instructed to wash the tattoo using an antibacterial soap, followed by using Aquaphor. We would wash and apply Aquaphor (not the petroleum-based cream) three to four times per day until the tattoo was fully healed. Healing could take anywhere from two to four weeks, depending on the size, location, and style. Your artist is equipped to give you an estimate of your healing.
This method is still used today especially for anyone who may have an allergy to Saniderm patches, typically the adhesive. It is rare but can still happen. We wanted to find a product that would allow you to focus on other things, other than your tattoo by using the patches.
Before you proceed with the steps below, please make sure you wash your hands before touching your tattoo.
HOW DOES SANIDERM WORK?
Saniderm is a medical-grade, breathable, waterproof tattoo bandage. Saniderm is engineered to be permeable to gasses, like oxygen. These bandages alleviate many of the pitfalls that come with other tattoo healing methods. Primarily, Saniderm drastically reduces the risk of contaminants entering the wound site of a fresh tattoo. Wearing Saniderm protects the area from unwanted shear/friction and allows the body to keep itself moisturized. Plus, it conveniently eliminates sessions of washing and applying aftercare to a new tattoo. The result is a tattoo healing experience that is safer, smoother, and more efficient.
HOW TO APPLY SANIDERM
- Cut and trim Saniderm to fit around the tattoo – include an extra inch around all sides. TIP: Cutting the edges of the bandage to be round will help it adhere better and feel more comfortable.
- Peel the white paper wrapping from the sticky side first and place gently over the tattoo.
- Once the adhesive side of the bandage is in place, remove the see-through second layer from the top side and smooth the bandage over the tattoo.
HOW LONG DO I KEEP THE PATCH ON MY TATTOO?
- The Tattoo Artist will put on your patch, after they are done with your tattoo. They will also provide you with the second one cut to match the size of your tattoo.
- Keep the first applied bandage on for anywhere from 3 to 24 hours, depending on how much the wound is weeping. Replace within 24 hours. It is fine if there is some plasma/blood/lymph fluid buildup under the bandage during this period, but do not leave it longer than 24 hours.
SANIDERM REMOVAL AND REAPPLICATION OF THE SECOND BANDAGE
- To remove Saniderm, find an edge of the bandage and pull it back over itself in the direction of your natural hair growth. The shower is the ideal place to remove the patch, as running water will help loosen the adhesive and relax the skin, making the removal much more comfortable.
- If you attempt to remove the patch while dry you may experience discomfort and added trauma to the skin.
- Discard the used bandage and wash the tattoo with a mild fragrance-free soap.
- Allow the tattoo to air dry or pat dry with a paper towel. DO NOT use a towel, as the fibers of the towel could infect your tattoo. Use a paper towel.
- Apply the second bandage by following the application steps listed above under “HOW TO APPLY SANIDERM.” Make sure the skin is completely dry, or the patch will not stick to the skin.
HOW LONG DO I KEEP THE SECOND PATCH ON MY TATTOO?
- You will keep the second bandage on for three to six days – the full six days being ideal.
- WARNING: If the skin appears irritated, there is fluid buildup, or the bandage is coming off, it is okay to remove the bandage sooner rather than later. By irritation, if you have itchiness around the bandage, little red bumps, then you are allergic to the adhesive. Remove the bandage, wash the adhesive off immediately. If the adhesive is not coming off quickly, you can use water and coconut oil to help remove the glue. Call or text the shop, so they can update your record with the allergy.
- Do not reapply any more bandages after the scabbing/flaking phase of tattoo healing has begun. If you find yourself bandage-less during this phase, make sure you are keeping the area thoroughly moisturized.
AFTER THE PATCH IS REMOVED NOW WHAT?
The critical phase is done! If you were able to keep your patch on for a maximum of six days, then you are almost done with the final phase of healing. You will keep washing your tattoo using antibacterial soaps and let it airdry or use a paper towel to dry it. You will use an aftercare moisturizer two to three times a day for about two weeks or until the tattoo is no longer peeling, dry or cracked. On the surface, the tattoo may appear to be fully healed once your second Saniderm bandage comes off. However, deeper layers of skin will still be rebuilding for the next two to four months. If the skin still looks “shiny” then the tattoo is healing.
WHAT IF I GET AN INFECTION?
Sometimes, our best efforts of taking care of the tattoo at home can still result in an infection. How do you know if the tattoo is infected? See some of the signs below:
- Red, Itchy bumps at the tattoo site.
- Redness and swelling remember that mild redness is to be expected the first two to three days after getting a tattoo.
- Pus with foul-smelling drainage.
- Worsening Pain.
- Systemic symptoms like fevers and chills
- Waves of heat and cold
- Abnormal Shivering
- Swelling of the tattooed area
- Red Lesions around the area
- Red streaking from the area
If you catch any of the symptoms early, minor bumps and rashes, this can be managed at home with an antibacterial ointment and the application of a hot paper towel.
- Get a paper towel and wet it with the hottest water you can tolerate. Apply this to the tattoo multiple times as soon as you discover signs of an infection. The heat and moisture will draw out blood, plasma, and extra ink sitting in your pores, which should result in a quick and scab free healing.
- Contact the tattoo shop, be sure to text over some pictures as well.
- Seek immediate medical attention if any signs of infection develop.
TOUCH-UP POLICY
There is one (1) complimentary “normal” touch-up service provided after completion of all sessions for the tattoo. Normal is defined by healing inconsistencies that have occurred within the normal two (2) week healing period. Instances in which the complimentary touch-up service would be invalid: soaking while healing, scratching or scratches, hand tattoos, feet tattoos (certain areas) or fading due to excessive sun or tanning bed use. Changes made to the completed tattoo are considered a new tattoo and are separate from the original piece. The complimentary touch-up service must be used within (1) calendar year of completion of the tattoo. Touch-up appointments will be on an appointment basis only.
WHEN IN DOUBT OR YOU HAVE ANY QUESTIONS DURING THE HEALING CALL OR TEXT US!

Tooth gems BEFORE and aftercare instructions & FAQs
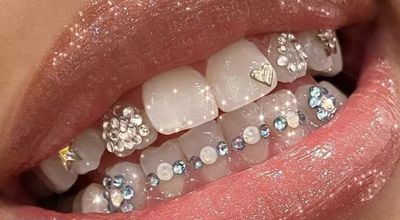
Before You Get Blinged Out- READ THIS
You need to come to your appointment with clean, flossed teeth. If you are also considering a teeth whitening treatment, this should be done before your tooth gem is applied. And if you wear a retainer (the wire type), bring it along so your practitioner can ensure your tooth gem is placed correctly. Below are steps to ensuring your tooth gems last!
- The process itself should take around 15 to 20 minutes, during which your practitioner will stick the gem to your tooth with special bonding material.
- You won’t be able to eat for two hours after the procedure and will only be able to eat soft food for the next 24 hours.
- Avoid high citrus foods/drinks 12 hours prior to your appointment.
- Eat + drink beforehand since there is a 2 hour wait after application.
- All other preparation will be done by your tooth gem artist.
- If you have veneers, crowns or false teeth, please give us a call before booking.
- If you wear braces, you will not be able to get any type of tooth gem at this time.
- If you wear a metal retainer, please bring the retainer so we can place the gem in the right area based on your retainer.
- If you wear invisalign, you will not be able to get tooth gems at this time.
Aftercare Instructions
Now that you have received your tooth gem, here are some steps to follow after your procedure is done:
- Do not touch or play with your tooth gem with your fingers or tongue.
- Do not eat or drink for 2 hours following your tooth gem application.
- Avoid brushing the tooth gem for 24-48 hours following application.
- Do not use an electric toothbrush for 48 hours after application.
- Avoid chewing hard food for 24-48 hours following application.
- Avoid consuming highly acidic drinks 24-48 hours following application.
- Keep teeth clean to avoid plaque buildup around the tooth gem.
Frequently Asked Questions (FAQ)
How Long Do They Last?
- As long as you take care of your tooth gem, you can expect it to last for around six months to up to two years.
- Know that certain factors may limit the life of your tooth gem, such as brushing your teeth too hard, eating hard candy, injury to the mouth, or wearing retainers.
How is a tooth gem applied?
- The Tooth Fairy will clean the tooth and the surrounding area with an antiseptic solution.
- The Tooth Fairy will mark the spot where the tooth gem will be placed with a pen or a marker.
- The Tooth Fairy will etch the tooth with an acid gel to roughen the surface and create a better bond for the glue.
- The Tooth Fairy will apply a thin layer of glue on the back of the jewelry and press it gently onto the tooth.
- The Tooth Fairy will use a curing light to harden the glue and secure the jewelry in place.- They will wipe off any excess glue and check the alignment and fit of the jewelry. The whole procedure usually takes about 10 to 15 minutes per tooth. It is painless and does not require any drilling or anesthesia.
What Happens If I Swallow My Tooth Gem?
- In the unlikely event your tooth gem falls off and you swallow it, don’t panic! The gems we use are non-toxic and have no sharp edges, so it will be safe for it to pass through your body naturally. No, your poop will not glitter. :)
Why You Should Have Your Tooth Gem Applied in the Salon
- If you want to brighten up your smile with bling, come and see us at Bad Decisions Tattoos and Piercings. Our Tooth Fairy will take great care of you!
- We only use gems that are 18-24 carat gold or 100% certified advanced Swarovski crystal approved by the American Dental Association in a safe and painless procedure.
How Do You Clean Your Teeth With Tooth Gems?
- You can continue to brush and floss as you normally do after getting a tooth gem. Like with braces, it’s important to keep the area around the tooth gem clean.
How Do You Remove Tooth Gems?
- Similar to the application process, tooth gems should only be removed by a professional — otherwise you run the risk of damaging the enamel of your teeth. Please do NOT attempt to remove the tooth gem yourself because the enamel might come off and damage your tooth.
- To remove the gems, you should make an appointment with your dentist. They wiill use a drill that essentially polishes the gem and bonding off the tooth. This is the same process they use if you ever had braces before, Tooth gem removal takes more time than the application because it won’t simply pop off. It requires extra care and precision to safely remove the gem and remaining bonding without damaging the enamel. That said, the procedure shouldn’t last more than 30 minutes.
What Type of Gems Do You Use?
- Bad Decisions Tattoos and Piercings is proud to share that we only uses top quality tooth jewelry that is safe for use in the mouth including - Authentic lead-free Swarovski and Preciosa crystals, 18k-22k gold charms, and genuine VS diamonds. We carry tooth gems from Sparkles by Maya.
Can I Still Have My Teeth Cleaned Every Six Months?
- Yes! You should still keep your dental appointments and keep brushing and flossing your teeth daily! Your oral hygiene routine should not change.
How Old Do I have to Be?
- We do prefer our clients to be 18 years of age, however with a parents consent we are willing to perform this procedure if you are 16 years of age or older. Parent or Guardian must sign the consent form, and be present for the aftercare instructions.